How to integrate WordLift Semantic tracking with Google Analytics via Google Tag Manager
Semantic Web Analytics is a powerful feature that was introduced with Wordlift 3.20 which allows you to better track your content and understand your audience. With the help of this feature, you can track entity usage across pages which in turn allows you to uncover the topics your visitors are interested in (thus you need to write more on those topics) and the topics which are not that popular among visitors.
If enabled, WordLift will send the Semantic Web data directly to your Google Analytics, which is perfectly fine if you have the Google Analytics tracking installed directly on the site or via a plugin. However, if your Google Analytics tracking is installed via Google Tag Manager, the default integration will not work so a custom integration via GTM will have to be performed.
Luckily, integrating the semantic entity tracking via GTM is really easy (as you will see below) so you don’t need to hire a Google Analytics expert for this.
To integrate semantic web analytics via Google Tag Manager you need to do 5 things:
- Enable “Analytics Settings” in WordLift plugin;
- Create the “Entity Type” and “Entity URI” custom dimensions in Google Analytics;
- Add the required variables in Google Tag Manager;
- Create the trigger to fire the GTM entity tag;
- Create the tag which sends the event with the entity data to Google Analytics.
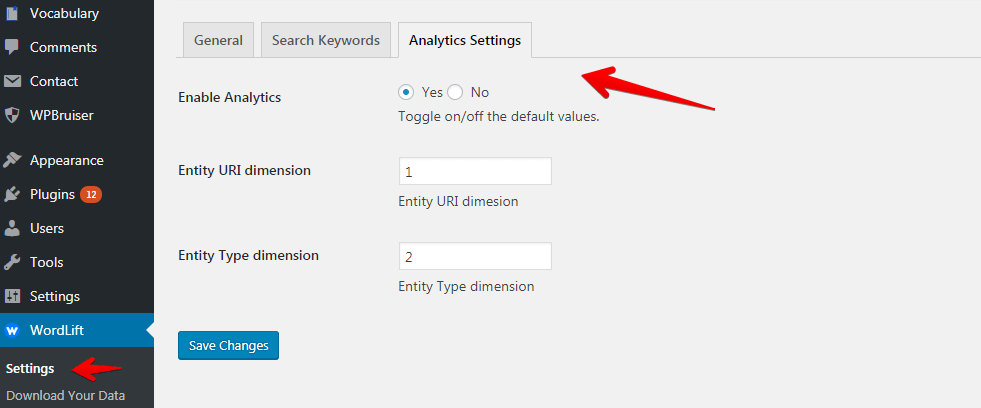
Enabling “Analytics Settings” in WordLift plugin
In your WordPress dashboard, navigate to WordLift / Settings / Analytic Settings and enable the analytic settings.
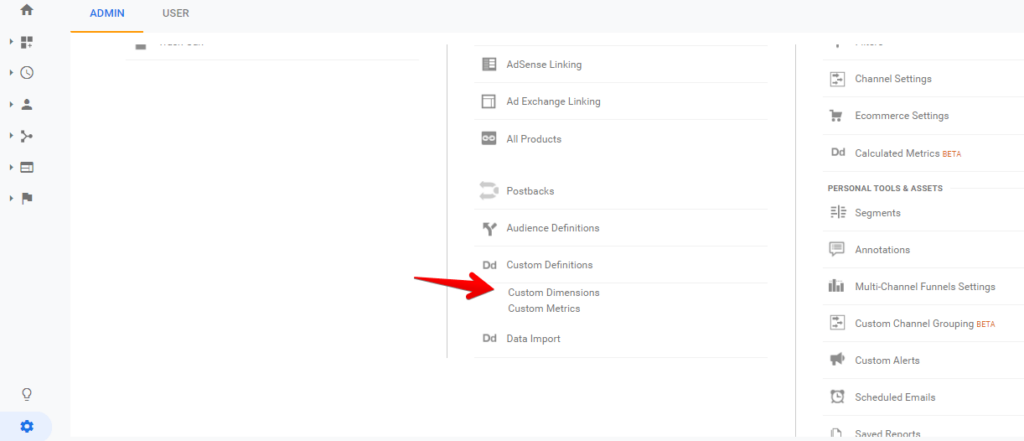
Creating the “Entity Type” and “Entity URI” custom dimensions in Google Analytics
After you have enabled analytics settings in WordLift, you need to go to the admin area of your Google Analytics account, and under property settings, click on “Custom dimensions”.
 In there, you need to create 2 custom dimensions with the scope set to “Hit” type. In our example we have named the custom dimensions “Entity URI” and “Entity Type”.

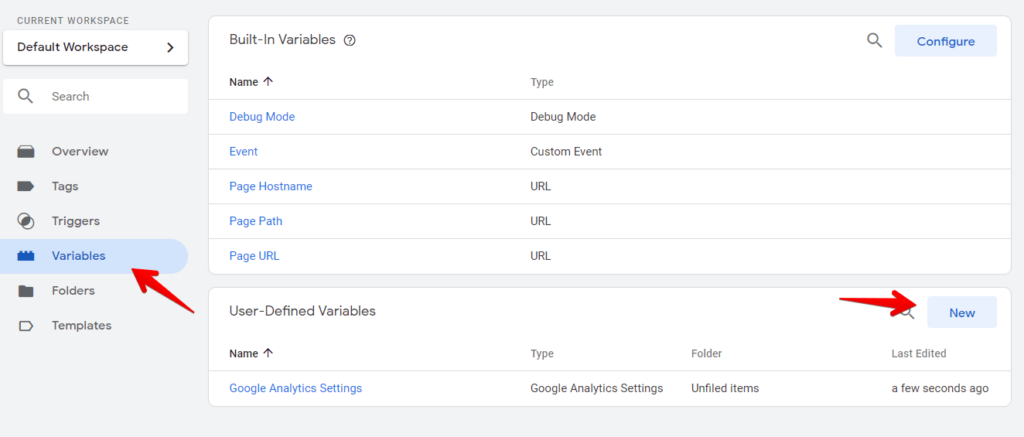
Adding the required variables in Google Tag Manager
After creating the custom dimensions in Google Analytics, we need to create the variables which we will use to pass data from WordLift to Google Tag Manager and from there, to Google Analytics.
In total, in this step we need to create the following variables: event_action, wl_event_category, wl_event_label, wl_event_value, wl_event_uri, wl_index_uri, wl_event_type, wl_index_type.
For this, open Google Tag Manager, navigate to “Variables” from the left menu and click on the “New” button.
In the panel that appeared, we need to enter the name of the variable (ex: event_action) and set the variable type as Data Layer variable with the “Data Layer Variable Name” field set to the name of the variable (ex: event_action). After configuring the variables, we need to click on the save button.
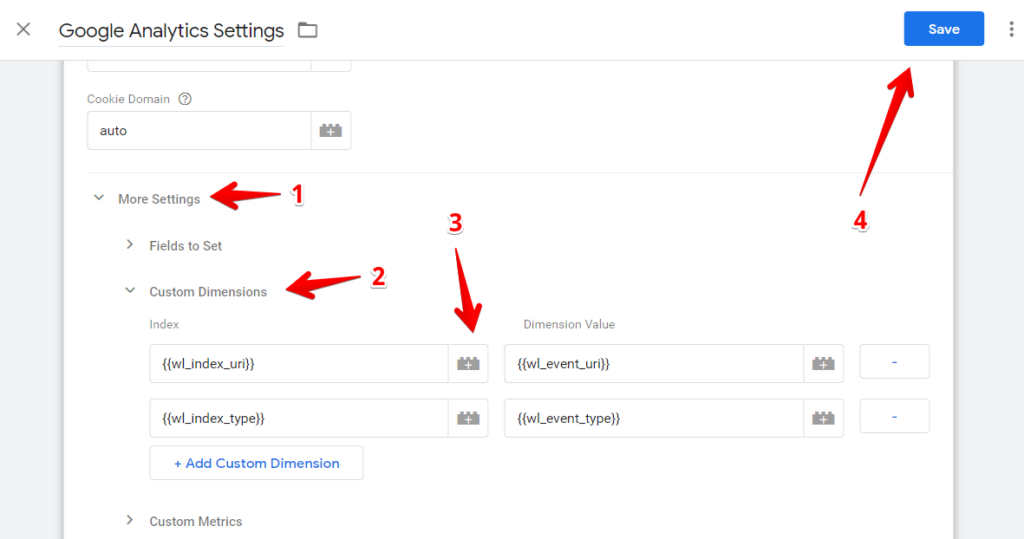
We need to repeat this process for all of the variables mentioned above. Next, in the “Google Analytics Settings” variable (if you don’t have one you need to create it), by clicking on “More Settings” (1), open the “Custom dimensions” options (2). In there, click on “+ Add Custom Dimension” button and in the “Index” field, click on the “+” button (3) and select the “wl_index_uri” variable while in the “Dimension Value” field select the “wl_event_uri” variable.
 Next, in exactly the same way, add the “wl_index_type” – “wl_event_type” variables in the next custom dimension and click save (4).
Creating the GTM trigger
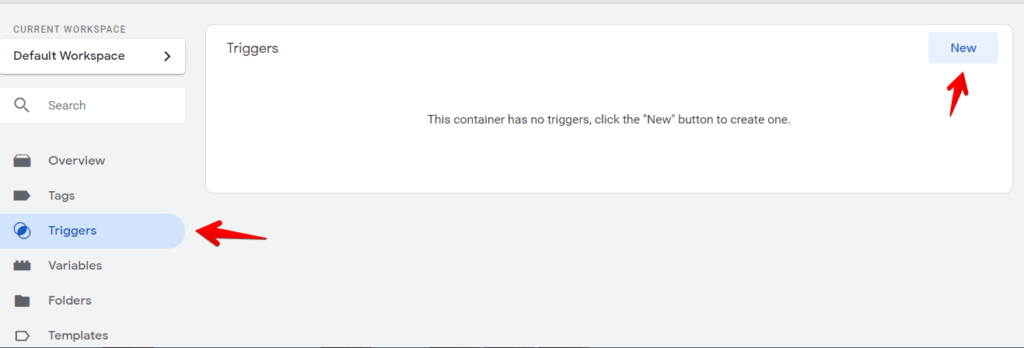
After creating the required variables, we need to create a trigger that will fire our entity event tag. For this, navigate to “Triggers” menu and click on “New”.
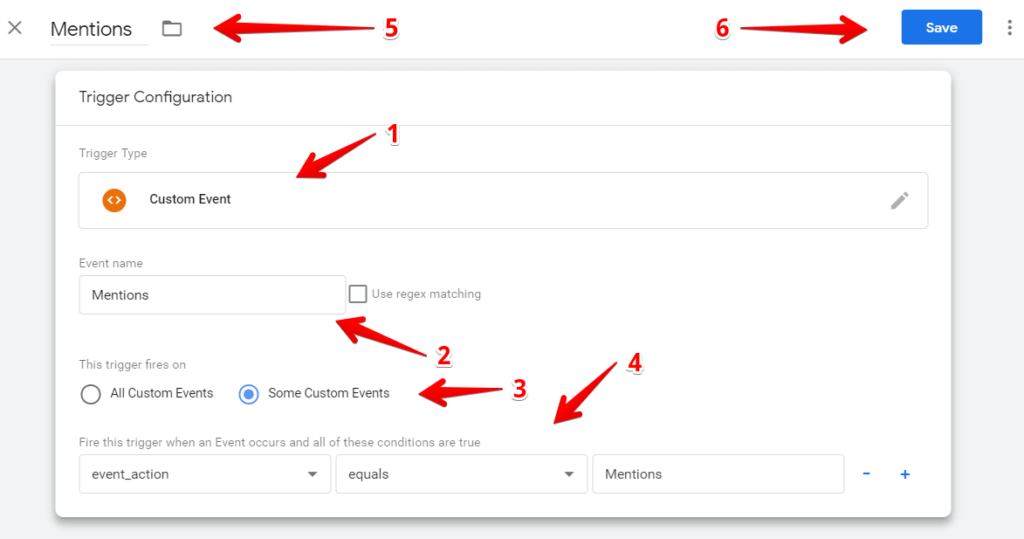
A new box will appear and in there, choose the trigger type as “Custom Event” (1) and in the “Event name” field, enter “Mentions”(2). In the “This trigger fires on” section, select “Some Custom Events” (3) and choose “event_action” equals “Mentions” (4). Give the trigger a descriptive name such as “Mentions” (5) and click save (6).
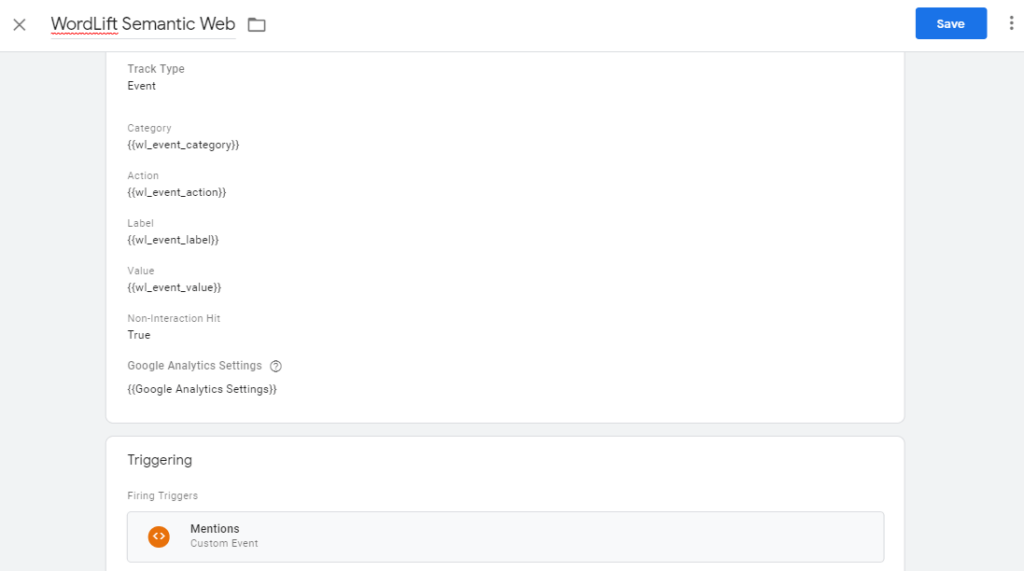
Creating the entity event tag in GTM
After we have created the variables and trigger, we can create the tag which will send the data to our GA property. For this, in the “Tag” menu, click on “New” and in the panel which appeared, click on the “Tag Configuration” area and select “Google Analytics: Universal Analytics”.

After this, set the “Track Type” to “Event”, category to {{wl_event_category}}, action to {{event_action}}, label to {{wl_event_label}} and value to {{wl_event_value}}.

We also need to set the “Non-Interaction Hit” option to “true” so that this event would not affect the bounce rate and in the “Google Analytics Settings” section, we need to choose the variable “Google Analytics Settings”
In the trigger section of the tag we need to select the “Mentions” trigger which we created earlier.
After saving the tag, you can enable the preview and debug mode to check if the tag is firing correctly and if data is being sent to Google Analytics. If everything is working fine, you can go ahead and publish the container.
With this integration, you will be able to track page entities in Google Analytics, both as events and as custom dimensions. Later, you will be able to view and analyze the data either in the “Events” report from Google Analytics or if you want to take your reporting and analysis to the next level, you can use Google Data Studio and import this beautiful dashboard created by Martin Reichhart from Salzburgerland.